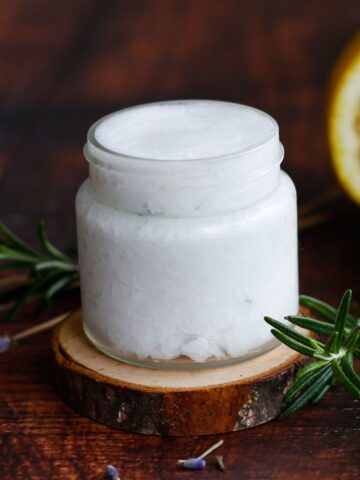
This DIY Oil Face Cleanser is a simple, yet powerful way to clean your face naturally. It gently removes dirt and impurities without the use of any soap!

This article will cover everything you need to know about your facial cleansing oil. From knowing why you should clean your face with oils, to creating your own oil cleanser, to how to use it correctly!
So please use this handy drop-down menu to navigate this post, if you need to. But, it’s always a good idea to read through everything first before you start making and using your oil!
Contents
Quick note, please do your own research and make up your own opinion. I’m a certified aromatherapist, trained in the holistic approach to skin health and natural skin care and not a dermatologist or scientific professional. It’s up to you which approach you prefer.
Now, with that being said, let’s dive right into it!
Does putting oil on my face cause breakouts?
First of all, why do we clean our face with oil? Doesn’t it sound super counter-intuitive? Besides, you may have heard that putting oil on your face clogs your pores and leads to major breakouts.
Well, that’s just one opinion. Even amongst dermatologists, the oil question is still debated. My opinion is of course that putting oil on your face is beneficial, IF you do it the right way!
The reason WHY I believe this to be true is 1) I’ve tried and tested this for years on myself and find it really helps my skin. My skin type ranges somewhere between combination, sensitive and normal skin.
2) People have done this for thousands of years! In Ayurveda, an ancient Indian medical system, practitioners recommend using oils on the face and the entire body!
And YES, I also believe that even people with oily and/or acne-prone skin should use oil on their skin! It’s, again, all about the right way and the right oils!
If acne and blemishes are ruling your world, then there is an imbalance present in your body. The skin is a reflection of your soul. I won’t go deeper into this as this would take up a whole blog post.
But I just wanted to mention this because a lot of people think they can heal their skin issues overnight when they don’t address the core of it all (such as bad eating habits, processed foods, hormone imbalance, etc.).

Benefits of Oil Cleansing
- balances the natural oil production
- gently removes dead skin cells and dirt
- lifts excess sebum for easy removal
- unclogs clogged pores (like blackheads and whiteheads)
- gentle makeup remover
- nourishes the skin
- natural ingredients
While traditional cleansers rely on the cleansing power of soap and other ingredients your skin doesn’t need, your homemade oil cleanser only contains natural ingredients (see ‘ingredients’ for more).
Harsh chemicals and other harmful ingredients aggressively attack the skin’s natural barrier and strip away the skin’s natural oils—whether there is excess or not! The result? Dry, sensitive skin!
The skin’s natural sebum production is disrupted and may lead to an imbalance and oily skin because the skin is desperately trying to moisturise itself by producing more sebum.
Whereas if you apply oil to your face, we bring the natural oil production back into balance as the oil only removes excess sebum and slowly rebuilds the skin’s natural barrier.
Furthermore, oil has anti-inflammatory properties (the degree depends on the oils you’re using), and contains vitamin E (the main component for healthy skin) and essential fatty acids (like linoleic acid).
So, oil cleansing not only nourishes our skin with vital nutrients but also gently removes dirt and other impurities to keep our skin happy and healthy!
How does the oil cleansing method work?
Oil cleansing works because simply put oil dissolves oil. Sebum is the oily substance produced by our skin, our skin’s natural oil in other words. When we apply oil to the facial skin, it encapsulates excess oil, surface dirt and debris for a deeper clean.
However, it so does this without removing too much sebum. The skin is always provided with enough to keep the balance.
The oil runs down into the pores and dissolves any impurities that clog them. By massaging the skin, we automatically “squeeze” the pores so that the oil then comes out easily. We’ll discuss the method in detail further on.

Ingredients
- 2-4 carrier oils, suiting your skin type
- essential oils (optional)
(see recipe card for quantities)
Carrier Oil: we’ll go deeper into this in a sec but first some general things about the oils (and essential oils). I always use cold-pressed, virgin and organic oils for my skincare. Quality matters!
Essential Oils: they are optional but can add some great benefits such as antibacterial, cleansing, and soothing properties (depending on what oils you choose to use).
Always make sure you use high-quality, therapeutic grade and pure essential oils!
Which oils to use
There are so many types of oil you can use for your DIY cleansing oil. If you’re new to oil cleansing, don’t let this overwhelm you! I’ll make it easier for you.
As already mentioned, the best oils to use, generally, are virgin oils as these haven’t been highly processed; only cold-pressed.
For this homemade cleansing oil, I suggest you choose 2-4 different oils for your blend. You can use only one oil, however, the magic lies in the mix!
Why? Because different oils have different viscosity. Some are heavier and thick whereas others are on the lighter side. We do want to have various textures because they act differently.
This is important for cleaning the pores because depending on the viscosity, the oils can only reach that far into the pore. So we want to go into them deep enough to clean them out as much as we can.
A light oil scratches the surface and removes the top bit. A medium oil goes a little deeper and the heavier ones may go all the way (but also because the other oils already did the work).
Caution: Before you get too excited and start mixing oils, we need to address the different skin types as well (right after this list)! Remember, we want to use the right oils!
Affiliate Disclaimer: This article contains affiliate links. That means I may earn a small commission, if you purchase the linked product, at no extra cost for you. All following links are affiliate links!
Light oils
- Apricot Kernel Oil
- Grape Seed Oil
- Hemp Seed Oil
- Jojoba Oil
- Macadamia Oil
- Rosehip Oil
- Sunflower Oil
- Sweet Almond Oil
Medium Oils
- Argan Oil
- Coconut Oil* (see notes below)
- Linseed Oil (flax seed oil)
- Olive Oil
- Sunflower Oil
- Sweet Almond Oil
Thick Oils
- Argan Oil
- Avocado Oil
- Castor Oil
- Evening Primrose Oil
- Linseed Oil
- Tamanu Oil
For your information, some of the oils appear in two categories. This is because they are somewhere in between or can differ in their texture depending on their origin/brand.
Coconut Oil
As you may already know, coconut oil solidifies in cooler temperatures and may not be the best oil to choose for your blend.
I've got a comprehensive guide and recipe for a coconut oil face cleanser here on my blog, too, where I inform you about the wonderful benefits of coconut oil and how to make the face wash!
Even though it’s highly beneficial for our skin due to its lauric acid content, I don’t recommend it for beginners. It causes breakouts for some people.

The right oil for your skin type
People with normal, dry or sensitive skin don’t have to worry all too much about using the right oils as they can use pretty much any of these oils. Unless you have an allergy to any of them, of course!
Dry skin definitely benefits from using medium and heavier oils. You might want to start by choosing 1-2 thick oils and 2 medium (or replace one of them with 1 light). Olive oil and evening primrose oil are great for dry skin!
Normal skin can choose 1 oil per category plus perhaps 1 oil from the light or medium oils. Sensitive skin may do this as well but it always depends on your sensitivity (or use the recommendations for dry skin).
If you have oily skin or combination skin you may choose 2 light oils and one that is medium-light (sweet almond or sunflower). See how you go. If your skin feels fine, you could experiment with adding 1 medium oil to your facial cleanser!
For acne-prone skin, it’s a little trickier. You need to focus on the lighter oils that won’t clog your pores. We call these oils ‘non-comedogenic’. Please note, that some of the light oils are comedogenic, hence clogging your pores!
Grapeseed, hemp, jojoba, macadamia, rosehip and sunflower oil are non-comedogenic and safe to use when you’re prone to blemishes or suffer from acne. I recommend choosing 2-3 of these oils to start with.
Essential Oils
I love including essential oils in this DIY oil cleanser recipe because they have so many benefits. They cleanse, calm irritated skin, prevent new breakouts, help bring the skin back to balance and promote relaxation. Depending on what you would like to achieve, you need to choose the oils.
Tea Tree: The best essential oil for your homemade cleansing oil is Tea Tree! Tea tree is antiseptic, antibacterial, antimicrobial and non-irritant—perfect for blemishes and acne-prone skin!
Niaouli essential oil is a great alternative for those who can’t use tea tree oil because it’s possibly sensitising for some people. Niaouli is non-irritant and non-sensitising with similar properties.
Lemongrass: Another of my favourite cleansing essential oils is lemongrass! However, lemongrass may be irritating and sensitising in some individuals.
Lavender: also has anti-septic properties but it’s also calming and soothing—for the skin as well as the mind. It’s one of my favourite oils to use in natural skin care because of its diverse uses!
Citrus Oils: have antibacterial properties. Lemon and lime counteract the overproduction of sebum. Lemon is especially useful for teenage skin issues. Sweet Orange soothes dry, irritated or acne-prone skin.
If using citrus oils, please note that these are phototoxic which means that they irritate the skin when exposed to sunlight. As we wash the face oil cleanser off afterwards, it shouldn’t be a problem. And ideally, you use this cleanser at night before you go to bed and not in the morning.

Instructions
How to make your DIY Face Oil Cleanser
Step 1. Choose the oils according to your skin type as described earlier (see ‘The right oil for your skin type’) and your liking.
Step 2. Add the chosen oils and essential oils, if using, to a clean, ideally, tinted glass bottle (see ‘storage’), close the lid and give it a good shake. Done!
How to use your DIY Face Oil Cleanser
Step 1. Apply a small amount of oil (about hazelnut size diameter) to your face and massage it in a circular motion for about 3-5 minutes. Be gentle with your face, no need to press or stretch the skin.
Step 2. Wet a washcloth with warm or hot water and remove the oil from your face. I often like to put the warm washcloth on my face first so the heat opens my pores for the next steps in my skincare routine.
Alternative Step 2. This is what I prefer doing because I’ve ruined a few washcloths before (my washing machine could not get rid of the oil…).
I like to wash my face with warm water and a gentle, natural face wash. This also ensures that all of the oil is removed.
Then I dampen the washcloth with hot water and place it on my face for a couple of seconds to open the pores. It’s also very relaxing and a nice thing to do in the evening, I find.
Step 3. Finish by applying a face serum (like one of my DIY serums) or a face cream (like this DIY aloe vera moisturiser).
Little note on the side: My friend asked me once why applying an oil-based serum doesn’t cleanse the skin, isn’t it the same procedure?
No, it’s not quite the same. Oil cleansing is done first, meaning we are removing all dirt and impurities. The oil in the serum then only nourishes the skin. That’s why we always apply oil serums on a clean face! (clean face = no dirt that needs removing)
The Adjustment Period
As with all-natural skincare products, it might take some time for your body and your skin to adjust to it. Yes, there is a chance you get some breakouts in the first couple of weeks, however, you should feel a difference after a month.
If you still get breakouts, you may need to change the oils. And if this doesn’t help, stop using this DIY face oil cleanser for 2-4 weeks and see if it makes a difference.

Storage
I like using a pump or dropper bottle (affiliate links) for this homemade oil face cleanser. If you choose to add essential oils, you have to store it in a tinted, ideally amber, glass bottle. I don’t recommend using plastic.
Essential oils are sensitive to light and lose their healing properties! So please, tinted bottle, and store it in your bathroom cupboard or medicine cabinet out of the light. The same applies to your carrier oils, too!
The shelf life of this oil cleanser depends on the oils you’re adding. Macadamia oil, for example, has a shelf life of 12 years! But generally, 6-9 months are definitely doable. Just note that essential oils do lose some of their strength the longer they’re stored.
Warnings & Safety
Please do your research about the oils you want to use first. Avoid oils from ingredients you’re allergic to. And always do a patch test first!
📖 Recipe
Equipment
- 1 tinted glass bottle (preferably amber, with pump or dropper)
Ingredients
General Recipe
- 2-4 cold-pressed, organic carrier oils of choice, see notes
- 8 drops high-quality, pure essential oils of choice, see notes
Example Recipe (for Normal Skin)
- 20 ml Jojoba Oil
- 20 ml Sweet Almond Oil
- 20 ml Castor Oil
- 3 drops tea tree essential oil
- 2 drops lemon essential oil
- 2 drops lemongrass essential oil
- 1 drop lavender essential oil
Instructions
How to make
- Choose the oils according to your skin type (see "The right oil for your skin type" in post) and your liking.
- Add the chosen oils and essential oils, if using, to a clean, ideally tinted (amber) glass bottle, close the lid and give it a good shake. Done!
How to use
- Apply a small amount of oil (about hazelnut size diameter) to your face and massage it in a circular motion for about 3-5 minutes.
- Wet a washcloth with warm or hot water and remove the oil from your face. If you prefer or if your skin still feels oily, use a gentle, natural face wash to get rid of the last bits.
- Finish by applying my DIY face serum and/or my DIY face cream.
Notes
Resources
- https://www.healthline.com/health/oil-cleansing-method
- Salvatore Battaglia, The Complete Guide to Aromatherapy


Leave a Reply