A homemade bentonite clay toothpaste can be a game-changer when it comes to maintaining healthy teeth and promoting overall dental health.

Made with natural ingredients, this simple DIY toothpaste supports strong teeth and enhances oral hygiene without the harsh chemicals in commercial toothpaste.
In this recipe post, we'll explore the benefits of using bentonite clay toothpaste and I’ll show you how to create your own, ensuring a natural, effective approach to keeping your smile bright and healthy.
Contents
By the way, if you’re new to making your own DIY toothpaste, I’ve got a comprehensive guide to natural toothpaste recipes and what you need to know before you start your journey!
And if you'd like to deepen your knowledge about natural oral care, here's an information-packed Guide to Holistic Oral Care!
Benefits
- all-natural ingredients
- clean teeth without toxic ingredients
- ideal for sensitive teeth
- remineralises teeth
- restores the overall health of your mouth
- fights bad breath
- prevents tooth decay
- zero waste—say goodbye to plastic tubes!
Making your own toothpaste has many health benefits. First and foremost, we’re ditching harmful ingredients such as sodium lauryl sulfate (SLS, a foaming agent) and hydrogen peroxide (brightens teeth).
Whilst store-bought toothpaste relies on such powerful, but utterly toxic, ingredients, we harvest nature’s power that is wholesome, safe and effective!

My whole DIY journey actually started with toothpaste as I reacted to the fluoride in my toothpaste—I’m sure that it was also in combination with the other toxins in that conventional toothpaste.
Ever since I began using my own homemade toothpaste, everything changed. I had my doubts, for sure, if this natural way of cleaning my teeth would actually work. But it simply does!
The basic ingredients we use in this recipe are designed to fight bad breath, prevent tooth decay and help remineralise the tooth enamel.
Remineralisation involves strengthening our teeth by fighting harmful bacteria and supplying them with essential minerals, particularly calcium, to help rebuild the enamel.
Ingredients
As previously mentioned, I’ve got a DIY toothpaste guide here on my blog where you’ll also find an ingredient list with additions for your own creation if you like.
Affiliate Disclaimer: This article contains affiliate links. That means I may earn a small commission, if you purchase the linked product, at no extra cost for you.
Basic ingredients
- (calcium) bentonite clay, food grade
- xylitol
- organic, cold-pressed coconut oil
- essential oils (such as peppermint or clove oil)
(see recipe card for quantities)
Optional ingredients
- kaolin clay or French green clay
- turmeric powder or activated charcoal (for teeth whitening)
- sea salt
- baking soda
- water
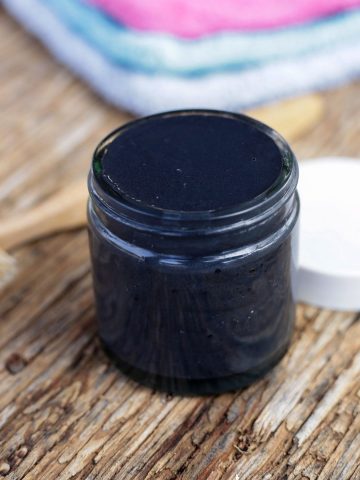
I already have several toothpaste recipes here on my blog. Including one with turmeric and one with activated charcoal, if you're interested.
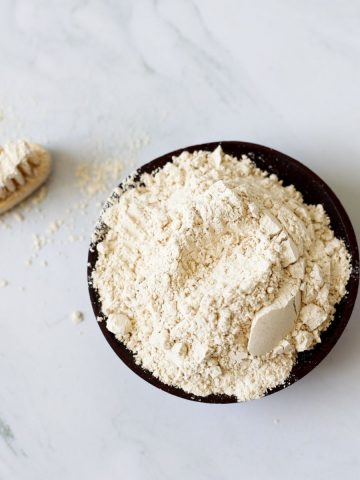
Bentonite Clay
Bentonite clay is our main ingredient. I find it to be the best clay for my toothpaste due to its specific mineral composition. There are two types of bentonite clay: sodium and calcium.
Since calcium is the main building block of our teeth, it might be a good idea to look for a clay containing it. I’m not sure though, how much our teeth actually absorb in this short time we brush our teeth.
If you can’t find a calcium bentonite clay, just use the sodium version. I don’t think it matters all too much. It’s not necessarily the calcium we need for this DIY toothpaste to work.
It’s actually the way the clay functions. Due to its electrical charge, it can bind heavy metals and toxins in your mouth. Once they are absorbed, they’ll stick to the clay.

These properties make clay the perfect ingredient to fight cavity-causing bacteria and to get rid of all the other bacteria that float about—without disrupting the natural balance!
This is a super duper important thing to remember and the same applies to essential oils. Natural ingredients have a certain intelligence. They don’t just erase all bacteria just because they’re antibacterial.
Unlike synthetic, toxic ingredients do. They kill everything that comes in their way and that’s the danger. Everything in nature is about keeping the balance and we encourage this by using natural ingredients.
Coconut Oil
Coconut oil diminishes the amount of harmful bacteria and plaque buildup, fights gingivitis, and may even prevent tooth decay.
The reason for this can be found in the medium-chain fatty acids in coconut oil (lauric acid) which are anti-microbial. They remove damaging micro-organisms and make it impossible for them to grow and multiply!
There are many studies [1] on how coconut oil affects our oral health and they found that coconut oil reduces plaque, prevents new buildup and may even help to reverse tooth decay.
Great alternatives for coconut oil are olive oil or sesame oil, in particular. Sesame oil is traditionally used for oil pulling, an Ayurvedic method to clean your teeth.
Essential Oils
Essential oils are always an amazing addition to incorporate into your oral hygiene routine. They soothe inflammation, combat bad breath, cleanse, etc.—depending on what oils you use.
Always make sure to buy high-quality, pure and therapeutic-grade essential oils. Stay away from cheap ones, they won’t be as powerful—if powerful at all! Quality matters!!

It’s also important to know that you always need to dilute essential oils with a carrier oil as they are highly concentrated (in this recipe, it’s coconut oil—or your alternative). So, don’t substitute the oil with water or something!
Some oils are stronger (be careful with cinnamon and clove oil) than others and you’ll notice that you won’t need many drops (rather 4 than 10)! People love to go overboard, so be wary of recipes that encourage you to use heaps!
When I first started out working with essential oils, I followed other bloggers' recipes and used their dilution (20-30 drops!!) without thinking about it. But that’s ages ago.
I’m a certified aromatherapist now and know better. Essential oils are so powerful, we don’t need that much. Less is more! In my recipe, I use a 0.6 % dilution (10 drops EO / 60 ml coconut oil).
My favourite essential oils to use in toothpaste are peppermint, clove, cinnamon, lemon, turmeric or OnGuard by doTERRA (I think this is similar to Thieves by Young Living).
Xylitol
Xylitol is a wonderful ingredient for your DIY bentonite clay toothpaste because it’s a formidable agent to fight cavities! And although it’s sweet, it’s not actually sugar but a sugar substitute!
So, yes, it won’t damage your teeth! In fact, it does the opposite—it does not cause tooth decay but reverses it!
Studies have shown that xylitol prevents harmful bacteria from growing and expanding. And, when used for some time, it slowly reduces the number of decay-causing bacteria so much so that your teeth are able to heal themselves and reverse tooth decay.

Optional Ingredients
There are a few more things you can add to your remineralizing toothpaste. But I wanted to take the time to discuss 3 ingredients many other recipes contain that I have my doubts about, and those are bicarb/baking soda, water and sea salt.
Baking soda does clean your teeth effectively, no doubt here. But it does so in a fairly abrasive way that could be detrimental to your tooth enamel. It’s a very active ingredient (just look at what it does in our baked goods).
Therefore, we need to either use it sparingly, in low doses (not more than ¼ teaspoon in a recipe like mine) or avoid it altogether. Of course, the choice is yours! Do your research and decide!
Water is another ingredient I often see in homemade toothpaste recipes. Often it’s used as a substitute for coconut oil or an addition if you want to put it into a squeezable tube.
The problem with water is that it doesn’t have a long shelf life. Even distilled water eventually goes off. Plus, if you use it instead of oil altogether, then you can’t add essential oils!

And as an additional ingredient, it’s just as bad because water and oil simply don’t mix and you would need to add an emulsifier. Water just stretches things and has zero benefits for your teeth! So ditch it!
Sea salt is an amazing ingredient for oral health and yes, you can absolutely add it to this DIY bentonite clay toothpaste! It’s naturally antibacterial.
I don’t use it in my toothpaste because I simply don’t like the salty taste that lingers on my tongue afterwards. I’d rather add salt to my DIY mouthwash and use it when I want to heal cavities or soothe a toothache.
Equipment
When handling clay, some people recommend using non-metal utensils and bowls because of the electrical charge. Metal may disrupt it and the clay may lose its potency. Others say that it doesn’t matter. I always use silicone/plastic utensils and ceramic bowls to stay on the safe side.
Other than that, you only need a small glass jar that is ideally tinted. This is because essential oils are sensitive to light and will lose their benefits over time, even more so when exposed to sunlight.
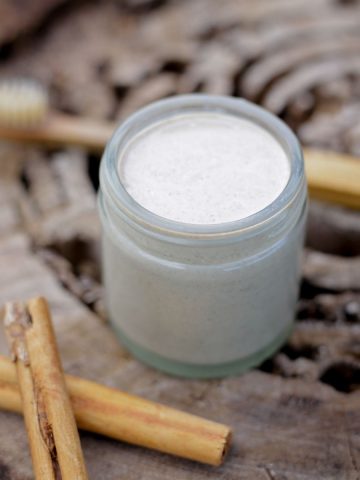
I’ve got an amber jar (you can get a similar one on amazon, affiliate link) and the one you can see in the photos. The clear one, I always leave in my bathroom cupboard, away from the daylight and I think that’s okay too.
Instructions

Step 1. In a small plastic or ceramic bowl, mix the dry ingredients (bentonite clay and xylitol) first.

Step 2. Make a small well in the centre and add the coconut oil. Then, drop your chosen essential oils on top of the coconut oil. Blend the oils first with a silicone spatula.

Step 3. Combine with the clay until a paste is formed. Pour into your glass jar and screw on the lid.
Storage
Keep this homemade bentonite clay toothpaste away from daylight, and at room temperature. Your bathroom cupboard is a good place to store it. Ideally, keep it in a small amber glass jar for extra protection.
This toothpaste has a fairly long shelf life, however, essential oils do lose their potency over time. A batch (60ml/2oz.) will last you for 1-1.5 months.
Warnings & Safety
This homemade bentonite clay toothpaste is safe to use but as always, please stop using it if you feel it irritates your mouth, gums, tongue or teeth!
As we’re using a low dose of essential oils, it should be okay. However, some people do react to them—peppermint, clove and cinnamon are known irritants!
📖 Recipe
Equipment
- 1 60ml/2oz. glass jar (preferably amber)
- Preferably, don't use any metal utensils. Ceramic, plastic, silicone or glass materials are better.
Ingredients
- 4 tbsp bentonite clay food grade, calcium or sodium
- 1 tbsp xylitol see notes
- 4 tbsp coconut oil melted
- 10 drops peppermint essential oil or oil of choice
Optional Ingredients
- 1 tbsp kaolin clay I like to substitute 1 tbsp of the bentonite with it
- ½ tsp turmeric powder
- ¼ tsp sea salt
Instructions
- In a small plastic or ceramic bowl, mix the dry ingredients (bentonite clay and xylitol) first.

- Make a small well in the centre and add the coconut oil. Then, drop your chosen essential oils on top of the coconut oil. With a silicone spatula, blend the oils first.

- Combine with the clay until a paste is formed. You may need to adjust the amount of coconut oil. Pour into your glass jar and screw on the lid.


Leave a Reply