This DIY Coconut Oil Face Cleanser is not only insanely simple and easy to make at home with just a few ingredients, but it’s also cost-effective and free of harsh chemicals! Best of all: This natural face wash recipe comes with a ton of skin benefits for healthy skin.

By using only natural ingredients, this coconut oil face wash harnesses the amazing power of nature to cleanse, nourish and moisturise your facial skin in a gentle but powerful way.
Coconut oil is our star in this easy DIY recipe because it has a multitude of benefits for our skin. Its natural antibacterial and moisturising properties make it the perfect ingredient for our homemade face wash. Paired with essential oils, this oil cleanser is unbeatable!
In this post, I’ll cover all the great benefits of using coconut oil as a facial wash and guide you through the step-by-step process of making this chemical-free face cleanser. I'll also explain the oil cleansing method (and how to apply it) and what you need to be aware of.
So, there’s a lot to cover. Without further ado: let’s begin!
Benefits
- removes dirt & impurities
- removes dead skin cells
- removes makeup
- moisturises the skin
- soothes dry skin
- suitable for most skin types
- antibacterial properties
- healthy, beautiful skin
- cheap & easy to make at home
- all-natural ingredients (no harsh chemicals)
Natural skincare is becoming more and more appealing because it offers a great alternative to conventional, often chemical-laden, skin care products that tend to have a detrimental effect on our overall skin health.
Conventional, harsh cleansers contain a ton of chemicals and synthetic ingredients you really don’t need! This all-natural coconut oil cleanser uses only natural ingredients that are gentle on your skin while offering you the same results: clear skin! That’s what we want after all, right?

Cleansing your face with oil is great for all skin types! Yes, even for oily and acne-prone skin (however, please refer to ‘Skin Types’ below for more details).
The oil cleansing method provides a gentle face wash without stripping off the natural oils of your skin. This protects your skin barrier and balances sebum production.
After the first use, you’ll notice softer, smoother skin! And using this method over time, a subtle, natural glow will show up on your face!
Benefits of coconut oil for skin
Why use coconut oil for skincare? Studies have shown that coconut oil has many benefits for our health—especially for our skin.
Moisturising Power: Coconut oil locks in moisture and penetrates deep into the skin, leaving it soft, smooth, and hydrated. Therefore, it’s amazing for dry and sensitive skin!
The fatty acids in coconut oil, particularly lauric acid, caprylic acid, and capric acid help retain moisture by forming a protective barrier over the skin, preventing water loss.
Natural Antibacterial Properties: Lauric acid has antibacterial, anti-fungal, and antimicrobial properties. This makes it effective in combating acne-causing bacteria, soothing inflamed skin, and reducing breakouts.
However, with that being said, please do a patch test before using this cleanser on your face! Not everyone’s skin appreciates coconut oil on the face! For some people, it’ll make the breakouts worse!
Gentle Makeup Remover: Unlike alcohol-based makeup removers that can dry out the skin, coconut oil dissolves makeup while keeping the skin hydrated. The oil binds with dirt and impurities, making it easy to wipe them away without stripping the skin’s natural oils.
Coconut oil breaks down makeup, including stubborn waterproof mascara, eyeliner, and foundation. NOTE: don’t use this DIY coconut oil face cleanser for removing eye makeup though!!! The essential oils we use will sting in your eyes!
Is coconut oil good for your face?
Yes and no! While you can apply this amazing oil to your whole body (even to your hair) without having any problems, it may be a whole different story for your face!
Since coconut oil is on the heavier side when it comes to viscosity, it is highly comedogenic which means it may clog pores for some people (read below, ‘Skin Types’ to see if you could be affected by it).
As with all my natural products, I recommend you do a patch test (I’ll explain how under ‘Warnings & Safety’) to make sure your facial skin is okay with it!
However, even if it passes the patch test, it could still mean your skin reacts to coconut oil over time. If you experience breakouts or irritated skin after a while, you may want to swap it for a different oil!
With that being said, sometimes your skin just needs to purge out the impurities which doesn’t mean that coconut oil is bad for you. Sometimes things have to get worse before they get better! It may take a month for your skin to adjust.
So, if you still experience breakouts after a month of using this DIY coconut oil face wash, then stop it!
Skin Types
While the oil cleansing method is suitable for all skin types, there are a few things to consider before you dive into making your own DIY coconut oil face cleanser. As mentioned above, coconut oil may not be the best oil for everyone!
Dry Skin: This gentle face wash is definitely great for dry skin because it doesn’t strip the skin’s natural oils like other cleansers usually do. Also, coconut oil is highly moisturising, leaving your skin smooth and soft.
Sensitive Skin: The same applies to sensitive skin. As we don’t use any drying or aggressive ingredients in this homemade coconut oil face wash recipe, it’s perfect for this skin type! Besides, coconut oil may soothe inflammation or irritations on top of that!
Oily Skin: If you have oily skin, you will need to see if it works for you. Coconut oil is highly comedogenic and thus, not recommended for oily skin. However, as we are washing the oil off again, it may be okay for you!
If you notice more breakouts, even after a month of using it, I recommend you switch to a lighter oil such as jojoba oil instead. You can read more about alternatives in my DIY oil face cleanser post.
Acne-prone skin: Coconut oil is high in lauric acid which is known to be effective in fighting off acne-causing bacteria. It may also heal scarring and soothe inflamed, irritated skin. You may want to check out this article to learn more.
As already mentioned several times, please do a patch test before applying this DIY coconut oil face cleanser. Observe your skin!
Combination skin: If you have this skin type, you need to be as careful as those with oily skin. Coconut oil could make it worse and clog your pores! For you, it might be an idea to use a blend of different oils (see link above, under ‘oily skin’).
Ingredients
- virgin coconut oil
- essential oils (such as tea tree oil)
Optional Ingredients
- vitamin E oil
- manuka honey
(see recipe card for quantities)
Coconut Oil
Virgin coconut oil is best because it hasn’t been processed. You may opt for organic as well if you prefer.
An alternative, if you prefer your DIY coconut oil cleanser to be liquid all year round, is to use fractionated coconut oil instead. Or also MCT oil would work! It doesn’t turn solid in colder temperatures.
You can absolutely use different carrier oils in this DIY recipe as well. Some of the oils that are great for a gentle face wash are: olive oil, jojoba oil, sweet almond oil, avocado oil or even castor oil. I list them all in my DIY oil face cleanser recipe.
Essential Oils
Affiliate Disclaimer: This article contains affiliate links. That means I may earn a small commission, if you purchase the linked product, at no extra cost for you.
- tea tree oil (or niaouli)
- lemongrass oil
- lavender oil
- citrus oils (lemon, lime, orange)
I love including essential oils in this DIY essential oil face cleanser recipe because they are therapeutic and beneficial for our skin.
They cleanse, calm irritated skin, prevent new breakouts, help bring the skin back to balance and promote relaxation. Depending on what you would like to achieve, you need to choose the oils.
Tea Tree: The best essential oil for your DIY coconut oil face cleanser is tea tree! Tea tree is antiseptic, antibacterial, antimicrobial and non-irritant—perfect for blemishes and acne-prone skin!
Niaouli essential oil is a great alternative for those who can’t use tea tree because it’s possibly sensitising for some people. Niaouli is non-irritant and non-sensitising with similar properties.
Lemongrass: Another of my favourite cleansing essential oils is lemongrass! However, lemongrass may be irritating and sensitising in some individuals.
Lavender: Lavender oil also has anti-septic properties but it’s also calming and soothing—for the skin as well as the mind. It’s one of my favourite oil to use in natural skin care because of its diverse uses! It also soothes inflammation and irritation! Great for dry & sensitive skin!!
Citrus Oils: have antibacterial properties. Lemon and lime counteract the overproduction of sebum. Lemon is especially useful for teenage skin issues. Sweet Orange soothes dry, irritated or acne-prone skin.
If using citrus oils, please note that these are phototoxic which means that they irritate the skin when exposed to sunlight. As we wash the face oil cleanser off afterwards, it shouldn’t be a problem.
Optional Ingredients
Vitamin E Oil: You can add vitamin E oil for an antioxidant boost!
Manuka Honey: Manuka honey has antibacterial and antiseptic properties which can help those with acne-prone skin as well as sensitive skin! It’s also a humectant, thus, highly hydrating—perfect for dry skin.
Instructions
How to make this DIY Coconut Oil Face Cleanser
Step 1. Soften the coconut oil if it’s solid by placing it in a warm area or heating it up on the stovetop over low to medium heat. Make sure it doesn’t get too hot. You’ll only need to warm it.
Step 2. Add your preferred essential oils to the coconut oil and decant the oil into an airtight container. And you’re done!
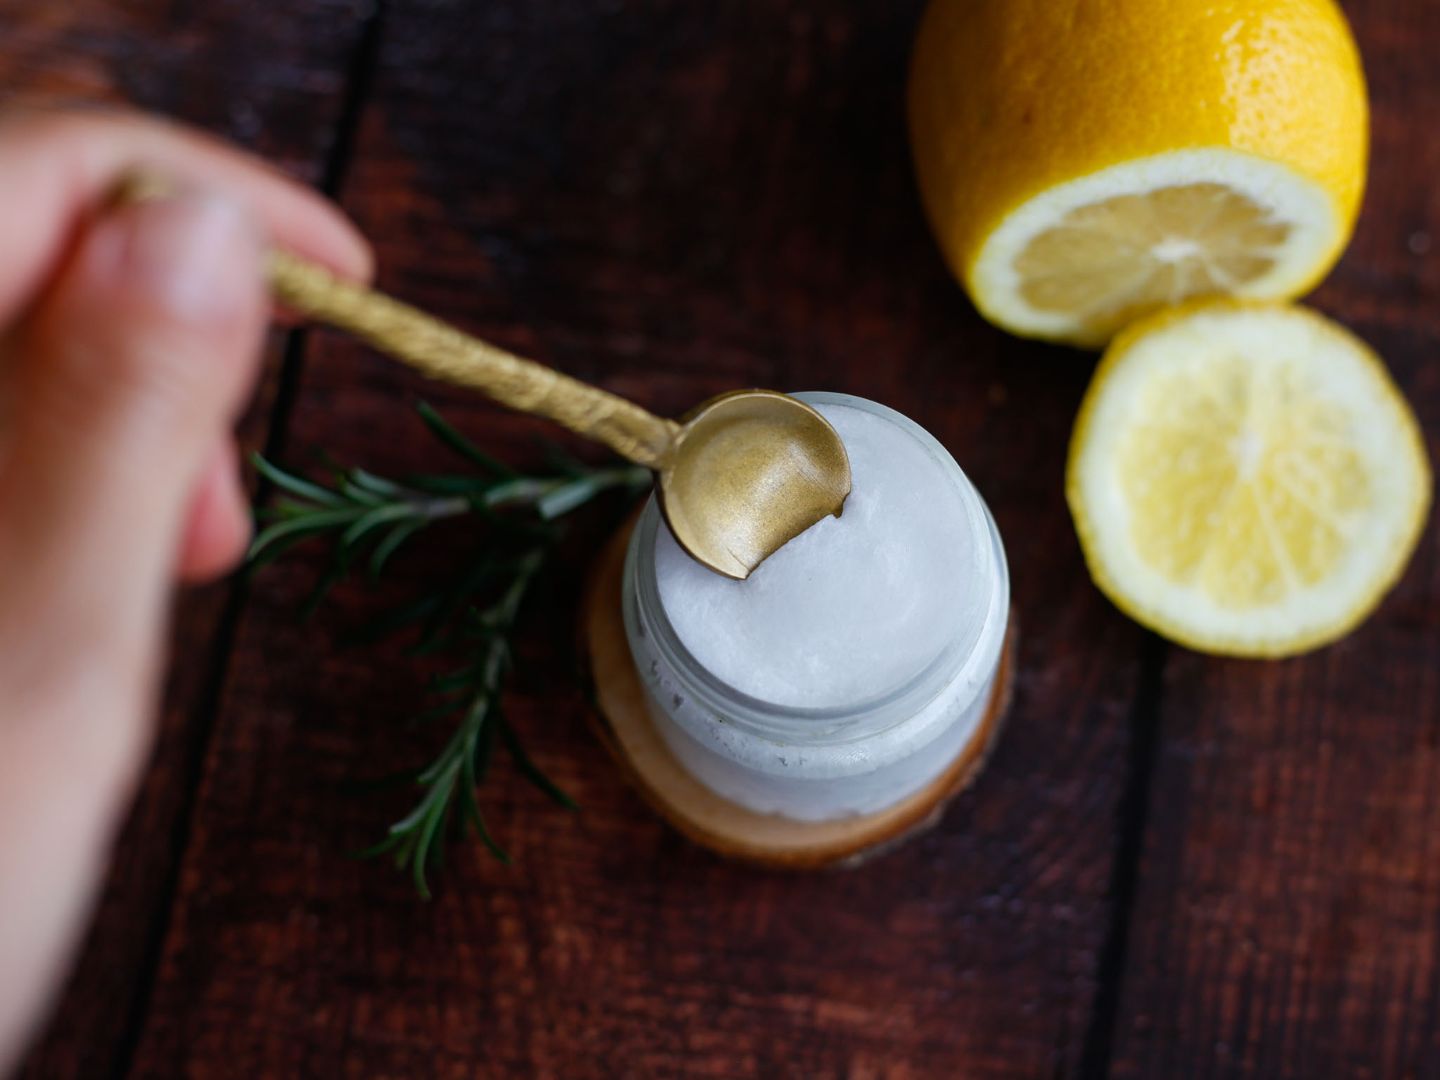
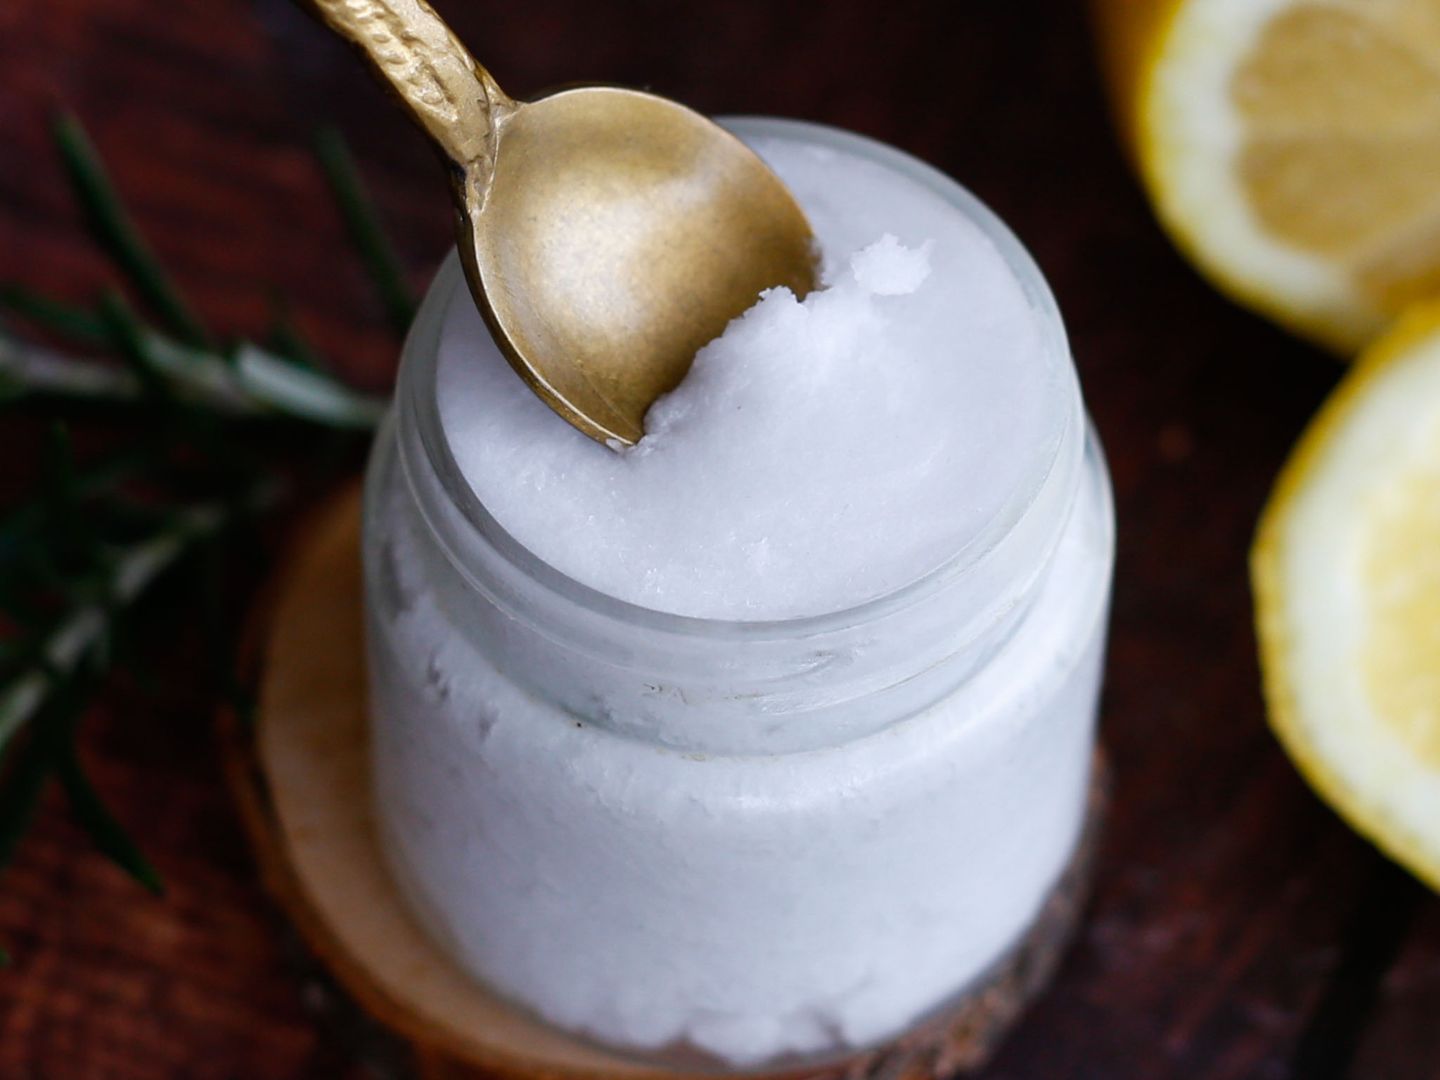
Since coconut oil hardens at a cooler temperature, I recommend storing it in a jar with an opening wide enough so you can get this coconut oil face wash out of the container—either with a spoon or your finger.
How to use this DIY Coconut Oil Face Cleanser
This DIY face wash is easy to include in your daily skincare routine! Here is how you use the oil cleansing method:
Step 1. Apply a small amount (about half a teaspoon) to your hands and massage the DIY coconut oil face cleanser onto your face in a circular motion for about 3-5 minutes. Be gentle with your face, no need to press or stretch the skin.
Step 2. Wet a washcloth with warm or hot water and remove the excess oil from your face. I often like to put the warm, damp washcloth on my face first so the heat opens my pores for the next steps in my skincare routine.
Alternative Step 2. I like to wash my face with warm water and a gentle, natural face wash. This also ensures that all of the excess oil is truly removed. I don't recommend this alternative for people with dry or sensitive skin.
Step 3. Follow up by applying a face serum (like one of my DIY serums) or a face cream (like this DIY aloe vera moisturiser) for best results.
Storage
Store your DIY coconut oil face cleanser in an airtight container at room temperature, ideally in your bathroom cupboard out of direct sunlight.
If you choose to add essential oils, you have to store the cleanser in a tinted, ideally amber, glass jar (affiliate link). Essential oils are sensitive to light and lose their healing properties!
Especially if you use tea tree in your face wash, make sure to keep it in an amber glass jar!! It turns toxic when exposed to light over time!
The shelf life of this natural face wash depends on the coconut oil. Check its expiry date to make sure it’ll last for a few months. Generally, 6-9 months are doable. Just note that essential oils lose some of their strength the longer they’re stored.

Warnings & Safety
Coconut oil is generally safe to use. However, it’s always a good idea to do a patch test before applying this DIY coconut oil face cleanser to your whole face.
Some essential oils can be irritating. Please do your own research before choosing to add them to your cleanser.
Patch Test: Apply a small amount of the cleanser to a small area of your skin. Your elbow crease is usually a great place to try it out because the skin is thinner and more sensitive.
Leave it on for 20 – 30 minutes, then remove it. In the next 24 – 48 hours, check for an allergic reaction in that area.
It might be a good idea to use it on a small area on your face as well, to see whether it’s okay for you. Particularly, if you have acne!
Even if the cleanser passes the patch test, it could still mean your skin reacts to coconut oil over time. Sometimes your skin just needs to purge out the impurities and things have to get worse before they get better! It may take a month for your skin to adjust.
If you still experience breakouts after a month of using this DIY coconut oil face wash, then stop it! A different oil might be the go for you!
📖 Recipe
Equipment
- 1 60 ml / 2 oz. glass jar (preferably amber)
Ingredients
- 60 ml / 2 oz. coconut oil about 50 g
- 3 drops tea tree essential oil see notes for essential oils
- 2 drops lemongrass essential oil
- 2 drops lemon essential oil
- 1 drop lavender essential oil
Optional Ingredients
- 1 teaspoon pure vitamin E oil
- 1 teaspoon raw honey manuka is great!
Instructions
How to make
- Soften the coconut oil if it’s solid by heating it up on the stovetop over low to medium heat. Make sure it doesn’t get too hot. You’ll only need to warm it.
- Add your preferred essential oils to the coconut oil and decant the oil into an airtight container. And you’re done!
How to use
- Apply a small amount of oil (about ½ teaspoon) to your face and massage it in a circular motion for about 3-5 minutes.
- Wet a washcloth with warm or hot water and remove the oil from your face. If you prefer or if your skin still feels oily, use a gentle, natural face wash to get rid of the last bits.
- Finish by applying my DIY face serum and/or my DIY face cream.

Leave a Reply