Get glowing, young-looking skin with this all-natural, nourishing, homemade banana face mask!

This face pack is easy to make at home, doesn’t need any special ingredients (but I’ll give you some add-on options later on!), and therefore it's insanely cheap! No need to go to a spa!
I make a face mask every Sunday, as part of my self-care routine in the evening. This banana face mask is one of my favourites to make because it’s so simple!
Especially in summer, when we are more outside and exposed to the sun, bananas can help us repair any sun damage and fight off those free radicals that could cause skin cancer.
Contents
So, let’s have a closer look at this highly beneficial homemade face mask! You can use this “jump to”-menu above to navigate through this post.
Ingredients
- banana
That’s it. All you need is a banana. Bananas, right? 😉 But, of course, you have so many more ingredients to choose from that go well in combination with banana (see “variations”).
The right Banana: You want to choose a ripe to overripe banana because the content of anti-oxidants actually increases while ripening.
And it’s those anti-oxidants after all that we want! Plus, the other nutrients we need, like vitamins and minerals, won’t change during the ripening process so there isn’t any loss.
Also, an overripe banana is easier to mash especially if you don’t have a blender and need to use a fork!
Instructions
How to make a Homemade Banana Face Mask
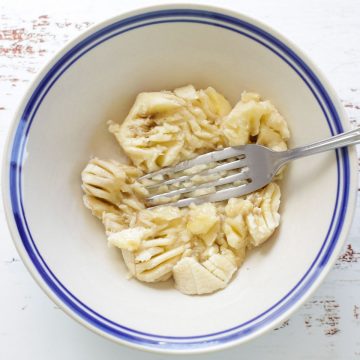
Step One. For this simple homemade banana face mask, peel a banana and place it in a bowl.
One banana, depending on the size, makes up to 6 treatments. But you can easily store leftovers (see “storage” for options) which is why I always use the whole banana.
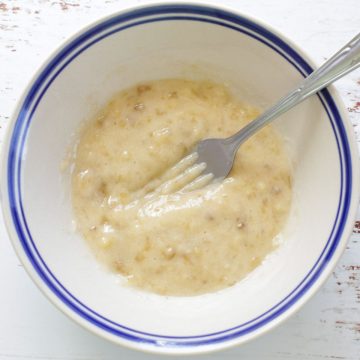
Step Two. Mash the banana with a fork until smooth and even (tiny pieces are totally fine). For a finer result, use a stick blender to puree the banana.
How to use this Homemade Banana Face Mask
Step One. Wash your face with a mild cleanser or warm water. Pat dry your face with a towel.
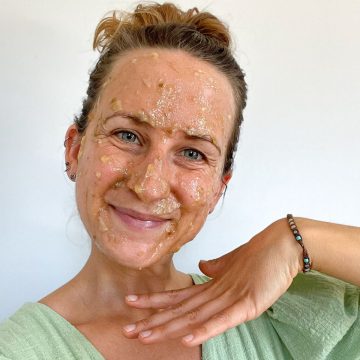
Step Two. Apply your banana face mask all over your face (and neck, if you like), leaving out the eye area, mouth and nostrils (you still want to breathe, right? :D).
Step Three. Leave the mask on for about 15-20 minutes. Then, gently remove the banana with a warm and wet washer. Rinse your face (and neck) with warm water to get rid of any residue.
Step Four. Finish with a serum (like this DIY serum for glowing skin) and/or a moisturiser (like this homemade aloe vera moisturiser).
FAQs
A Banana Face Mask reduces the appearance of fine lines and wrinkles, leaves you with glowing, younger-looking skin, prevents sun damage, gently exfoliates and soothes inflammation.
Yes, you can apply bananas directly to your face. However, I recommend doing a patch test beforehand, in case you react allergic to bananas (see “safety & warnings” for more info)!
You can use many different foods, herbs, spices and oils with bananas for a face mask. For example, yoghurt, cucumber, avocado, cinnamon, turmeric, neem, or essential oils (see “variations” for recipes)!
Yes, you can. Leftovers keep well in the fridge for up to a week or you can freeze them (see “storage” for more).
Yes, absolutely. Banana is highly beneficial for our skin because it contains vitamin B6, C, E and A, minerals like potassium and silica as well as antioxidants that fight free radicals (see “benefits” below).
You can if your skin tolerates it. However, bananas can trigger allergic reactions which is why I wouldn’t recommend using it daily. 2-3 times per week should be plenty (I only use it once a week/month).
Overripe bananas have a higher antioxidant content which makes them much more valuable than their green counterparts. What kind of banana, like Lady Fingers, Cavendish, etc., doesn’t really matter.
Banana Face Mask Benefits
- anti-ageing
- glowing skin
- reduces & soothes inflammation
- prevents sun damage
- gently exfoliates
Bananas are loaded with essential nutrients like vitamins (B6, C, E and A) and minerals (particularly potassium and silica) as well as anti-oxidants.
The minerals silica and manganese are responsible for increasing collagen production. With age, our skin produces less collagen which is responsible for the tightness and plumpness of the skin.
Thus, this banana face mask is great support for your battle against fine lines and wrinkles! But remember, it’s not a remedy, simply an aid along the way!
Bananas are also extremely nourishing and moisturising, leaving you with plump and glowing skin. It’s particularly the potassium and vitamin B6 in bananas that may help those of us with dry skin.

Due to its antioxidants, as in vitamin C and E, bananas are known to fight off free radicals that can harm your skin.
This comes in handy when we’re exposed to the sun a lot because those anti-oxidants found in bananas may prevent and repair sun damage, lowering the risk of skin cancer!
It’s also those anti-oxidants that soothe inflammation and may heal small wounds and may reduce the appearance of scars (like acne scars).
Variations
There are many additional ingredients you can add to this homemade banana face mask, but just to give you some ideas, here are some recipes to try!
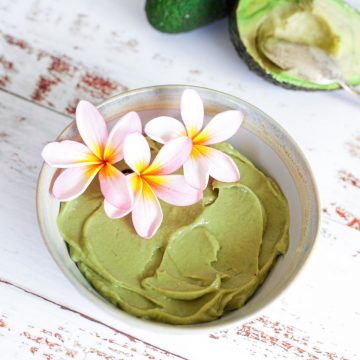
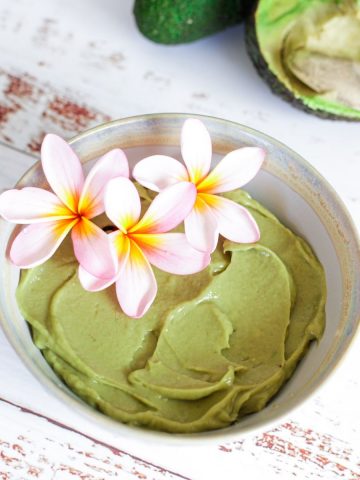
Avocado and Banana Face Mask
Benefits: Avocado moisturises and prevents dry skin and inflammation while restoring the natural balance of the skin. It’s also anti-microbial and helps prevent/reduce breakouts.
Skin Conditions: Avocado is a very beneficial addition to your banana face mask if you have dry, irritated skin or struggle with blemished skin.
Instructions: Mash a banana and half of a small avocado with a fork or a stick blender (for a finer result). Proceed as described above (see “instructions”).
→ see the full recipe here!
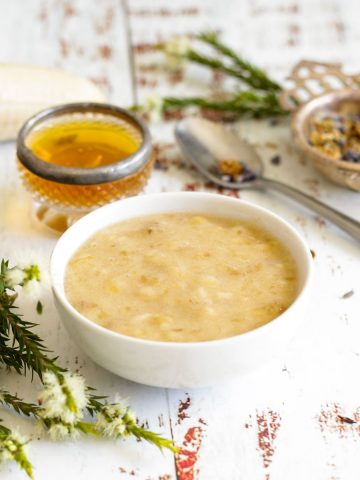
Honey and Banana Face Mask
Benefits: Honey is a natural antiseptic, antibacterial and humectant which means it’s hydrating.
Skin Conditions: Adding honey to your banana face mask is great for dry skin as well as for acne-prone skin or for if you want to reduce the appearance of acne scars.
Instructions: Mash a banana and add about ½-1 tablespoon of honey. Proceed as described above (see “instructions”). Avoid honey, if allergic to bees and/or their products. Always do a patch test first.

→ see the full recipe here!
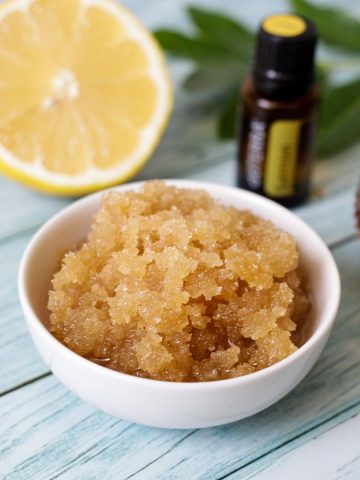
Oatmeal and Banana Face Mask
Benefits: Oatmeal is a natural exfoliant that moisturises and cleanses the skin gently. It also reduces inflammation.
Skin Conditions: Oatmeal is an excellent addition to your banana face mask if you have dry skin, want to get rid of pimples/acne and need to calm and relax irritated skin.
Instructions: Mash half a banana. Mix 2-3 tablespoons of oats with a bit of water and leave it to soak. Then, mix in mashed banana to form a paste. Proceed as described above (see “instructions”).
Yoghurt and Banana Face Mask
Benefits: Yoghurt contains lactic acid, an alpha hydroxy acid (a gentle exfoliant). This prevents breakouts, diminishes the appearance of lines and wrinkles and leaves you with glowing skin.
Skin Conditions: Adding yoghurt is great for an anti-ageing treatment, for glowing skin and also for acne-prone and blemished skin.
Instructions: Mash a banana. Add 2 tablespoons of yoghurt and mix well. Proceed as described above (see “instructions”).
Turmeric and Banana Face Mask
Benefits: Turmeric contains antioxidants, and is anti-inflammatory and anti-microbial. It leaves you with glowing skin, diminishes blemishes and boosts collagen production.
Skin Conditions: Turmeric is a powerful ingredient for those who are looking for glowing skin and who would like to get rid of blemishes.
Instructions: Mash a banana. Add 1 teaspoon of turmeric and mix well. Proceed as described above (see “instructions”).
Little Warning: you may look like a Simpsons character afterwards, but don’t worry! The yellow glow is only temporary.
Banana Peel Face Mask
Whenever you eat a banana or make this banana face mask, don’t throw out the banana peel! You can use it too!
In fact, it’s a lot easier and simpler than this recipe because you basically just rub the inside of the banana peel over your face. It leaves a thin layer that dries up quickly.
You only leave it on for about 5 minutes and then wash it off! Super easy! But, just a reminder, I wouldn’t use it on a daily basis because bananas can cause allergic reactions and irritations.
Storage
Leftovers can be stored in an airtight container in the fridge for about a week. Just remember to take out your banana face mask about 30 minutes prior to let it warm up to room temperature.

Alternatively, you can also freeze this face pack for up to 3 months. My top tip: freeze them in an ice cube tray (see picture) so you have small amounts ready to go for when you need them!
You can freeze bananas in general, by the way. If you have some overripe bananas that need using, peel them and freeze them in an airtight container or a zipper bag. When you want to make this face mask, simply defrost and mash!
Safety & Warnings
Allergic reactions to bananas are possible and may even become life-threatening. Use caution when allergic to any other fruit or vegetable in the latex family.
ALWAYS make a patch test before trying any of my recipes! Apply a bit of banana mash on the inside of your elbow and let it sit for 20 minutes. Wait for 24-48 hours for any reactions (like irritations, itchy skin or redness).
If any reactions occur, do NOT use this banana face mask. Also, if you notice rashes or the like after a few applications, stop using this face pack!
📖 Recipe
Ingredients
- 1 banana ripe to overripe
Optional Add-In's
- ½ avocado
- 1 tablespoon honey ideally raw
- 2-3 tablespoon oats instant or flour are best
- 1-2 tablespoon plain yoghurt dairy-free, if vegan
- 1 teaspoon turmeric powder
Instructions
How to make the mask
- For this simple homemade banana face mask, peel a banana and place it in a bowl.
- Mash the banana with a fork until smooth and even (tiny pieces are totally fine). For a finer result, use a stick blender to puree the banana.
- Add other ingredients, if you like.
How to use the mask
- Wash your face with a mild cleanser or warm water. Pat dry your face with a towel.
- Apply your banana face mask all over your face (and neck, if you like), leaving out the eye area, mouth and nostrils.
- Leave the mask on for about 15-20 minutes. Then, gently remove the banana with a warm and wet washer. Rinse your face (and neck) with warm water to get rid of any residue.
- Finish with a serum and/or a moisturiser (I've got a few recipes for them here on my blog, too).
Notes
- Storage: Leftovers can be stored in an airtight container in the fridge for about a week. Alternatively, you can also freeze this face pack for up to 3 months. My top tip: freeze them in an ice cube tray.
- Warning: Allergic reactions to bananas are possible and may even become life-threatening. Use caution when allergic to any other fruit or vegetable in the latex family.
Resources
- https://indianexpress.com/article/lifestyle/life-style/benefits-of-banana-for-hair-skin-5958559/
- https://www.healthline.com/health/avocado-benefits-for-skin
- https://www.news18.com/news/lifestyle/5-reasons-why-banana-is-good-for-your-skin-3967586.html
- https://www.daburhoney.com/benefits-of-honey/honey-for-face-and-skin/using-honey-for-face-and-skin
- https://www.medicalnewstoday.com/articles/oatmeal-benefits-for-the-skin
- https://www.organicauthority.com/energetic-health/5-skin-rejuvenating-treatments-using-yogurt
- https://skinkraft.com/blogs/articles/benefits-of-turmeric-for-glowing-skin
Leave a Reply